Fiber Preparation
1. Select a piece of cable to cut jacket with the peeling pliers, usually the length is 70cm. We need to cut the Armour layer if it has metal Armour layer. At this point the cable should be fixed to the patch panel or fiber closure to prevent damage to the fiber.
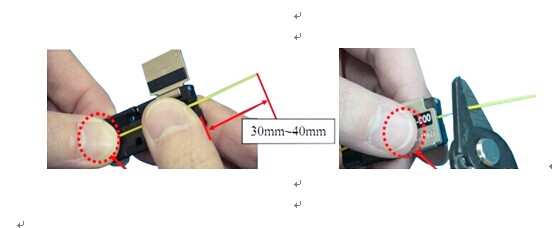
2. Stripping PBT loose tube to expose one or more bare fibers, the length is usually about 60cm, remove gel on fiber surface layer.
3. Put protection sleeve on the fiber, pare the gel with peeling pliers, flick fiber with fingers to test whether the fiber is still intact. Take moistened with alcohol tissues or sterilized cottons to gently clean the two fibers. Different fiber fusion splicers have different lengths, it should be strictly in accordance with the instructions.
4. Follow above steps to peel out bare fiber from another piece of cable.
Fiber Fusion
1. To start with, check fiber fusion splicer is working properly.
2. Cut fiber whose end with clean fiber cleave and make sure that the end is smooth, no cracks to fiber and other issues, these may lead to splice failures.
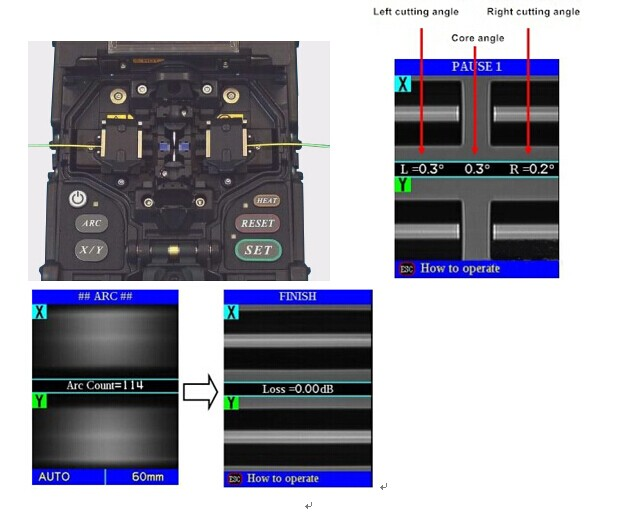
3. Fixed the two pieces fibers of the good end face into the fiber fusion splicer V-groove. Selecting Auto mode. After covering the windshield, the fusion splice is automatic welding.
4. When the fusion is completed, fiber fusion splicer analyses the welding results and estimates the loss. If it needs to rework, machines give instructions to the operator.
5. Remove the fused fiber. Push protection sleeve to the welding position, after that putting it into fiber fusion splicer machine over heat until the protective tube due to thermal shrinkage, play the role of the protection of the fiber.
Fusion Assessment
1. After the process of fusion, visually inspect effects from the direction of the X-axis and Y-axis. As shown below, some defective items do not affect the optical transmission can be used as qualified products.


